I haven’t had any problems, but this is one of those things that goes bad when you have a full tank of gas and are out in the middle of no-where.
Considering our Southwind is 19 years old, I decided to replace the pump as a “Preventative Maintenance” issue. After getting the tank on the ground and taking a closer look, I’m glad I did. Scroll down to bottom to view all photos.
THE PUMP
I bought a new pump from Amazon. AIrtex E2224S, $85 (free Prime shipping).
This pump has three tubes. A pump supply, pump return, and a third tube for the generator pickup. On my original pump, I noticed there was a short rubber hose extension on the generator pickup tube. I measured the depth of the tube (11 inches from the top) and then transferred the rubber extension to my new pump. However, I placed the hose at 12.5 inches. This will allow the generator to run down to about 1/8 tank.
I used the Southwind leveler jacks to raise the motorhome. I then put safety stand under the axle. There needs to be enough room to work and also to slide the tank out when its on the ground. I used a couple long 2x4s laying on the ground to make sliding the tank easier.
DRAIN TANK
 The tank is heavy, and even when empty, there’s still some gas in it.
Plan ahead, run the tank level down as low as you can. Last spring on our return trip from Arizona, I knew I was going to pull the tank when warm weather came, so I didn’t put gas in the motorhome for the last couple hundred miles.
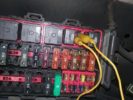
My fuel pump was still functional, so I was able to use the pump to empty the tank. I connected a hose to the fuel filter, then used a jumper wire to energize the fuel pump .
The fuel filter is located on the drivers side frame rail just behind the front tire. I removed the front line and pushed a hose onto the fuel filter tube.. I then removed the fuel pump relay, and then used a jumper wire to to apply power to the pump.
REMOVING TANK
The tank is held up with four large support brackets. To secure the tank to the brackets, four straps goes over the top of the tank and bolt to these brackets. All the bracket bolts are easy to get to, EXCEPT. On mine, the rear leveling jacks support plates are directly over the 2nd set of support bracket, making it a challenge to remove the bolts.
Remove the nuts (8) that secure the four straps.to the support brackets.
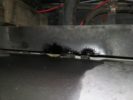 Remove the filler and vent hoses from the tank. The hoses go through a oval shaped opening in the frame. There is a 1/2 inch gap between the tank and the frame to get a small socket to loosen the hose clamps.
Remove the fuel hose from the generator..
Remove the tank vent hose from the Evap metal tube located just forward of the left rear wheel on the inside of the frame rail.
Using a jack with a large block of wood, support the tank between bracket #2 and 3. Remove support brackets # 2, 3 and 4. On the front bracket (#1) remove the top bolt only, and loosen the the bottom bolt one turn. This will allow the front bracket to swivel.
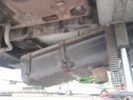 Slowly lower the rear of the tank. Verify the nothing is getting hung up.
(NOTE I used a couple long 2x4s laying on the ground to slide the tank on)
With the tank at an angle, you can reach up on the top of the tank to disconnect the fuel line and return line. You’ll need one of those quick disconnect tools to release the connector.
Disconnect the electrical connector.
Everything should now be disconnected and the tank is ready to drop.
Move the jack and block to the front of the tank. Raise the tank a little so it clears the support bracket, then push the tank toward the rear to clear the bracket.
Lower the tank to the ground. Re-verify everything disconnected, then slide the tank out from under the motorhome.
NOTE – I used a couple long 2x4s as a lever to raise the tank a little when I needed to remove or install the floor jack under the tank.
REPLACE PUMP
The bolts had some rust on them, so I used a wire brush to clean most of the rust off, then I squirted the bolts with PB Blaster. and let them soak a little.
When removing the nuts, I’d back them out a little until I started getting resistance, then snug them back up, and re-squirted PB blaster. This kind of helped re-cut the threads on the rusted bolts. Take your time. A couple bolts took four or five iterations of loosen / re-tighten..
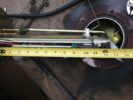 The old pump had a short extension on the generator pickup. I measured the length of the tube (and extension) from the top, it was 11 inches. I then installed the extension on the new pump, but made it 12.5 inches. wanted a little extra gas, this should run the fuel down to about 1/8th tank instead of the 1/4 tank.
IMPORTANT – If I run the genny until its out of gas, I better make sure I’m within about 50 miles of a gas station.
REPLACE VENT and FUEL LINES
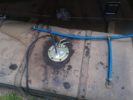 The generator fuel line was very hard (not flexible.) so I replaced it with quality 1/4 inch gas line (about 4 ft) . The EVAP purge vent lines were also deteriorated, so I got 1/2 in ID fuel hose and replaced the vent lines.
I used fuel injection clamps on the generator fuel lines. The EVAP vent hoses didn’t have clamps on them where they connected to the tank and the EVAP metal tube (in front of the rear wheel). They do now.
RE-INSTALL in the reverse. order.. Get the front of the tank up on the forward support bracket, then you can reach in, connect the supply and return lines, and also the electrical connector.
Raise the rear of the tank then install the three rear support brackets.
DON’T tighten any hardware until all nuts and bolts are started..
NOTE – On the four bracket bolts that were difficult to get to (under the leveler jacks) I cut about 1/2 inch off the bolts to make them easier to get my ratchet wrench up in there
NOTE – To get the strap bolts to go back in the holes, I raised the tank a little bit, then guided the bolts studs into the bracket holes.
IMPORTANT, INSTALL a new fuel line filter. This should catch any debris that gets kicked up during the fuel pump replacement.
Great instructions.
I have a 1999 Newmar Dutchstar. Never thought of fuel pump replacement.
Last truck pump lasted 250000 miles. Thr actual float on it crapped out.had it replaced for 185 bucks. Dont think I would do it myself at 75 yrs. Did lots of racing years ago did all work on everything. Didn’t hesiate back then.
Thank you. I;ve had 2 fuel pump failures , all high mileage..
I look at preventative replacements as juggling the numbers:
Whats the probability of failure, what are the consequences of the failure, and what is the cost for preventive maintenance replacement.. In the case of my fuel pump, probability is low, but its coming up (low mileage, high age), consequences are very bad, cost of preventative replacement is marginal..
The only issue of doing preventative replacement is the infant mortality.. i.e. new parts fail very quickly, if not, they’ll last a long time
Your site had been such a great source of information – THANK YOU for taking the time to post!!! If your ever in the Upstate of SC please let me know I owe you many beverages of your choice!!
Thank you..
Has anyone tried cutting a hole in the floor to bypass having to drop the tank? I’m working on a ’96 bounder with Ford motor.
Wade, I’m need to replace my fuel pump also. RV won’t start so I have to do it in the dirt. I was thinking the same thing, cut a hole under the bed, A lot less work.
Did you try it?
I’m 81, in good shape but doing it alone is not to my liking.
I haven’t tried it yet. I bought a manual online and it’s nearly 4000 pages. I’m having a hard time finding anything. ?
I cut a hole in the floor beside the bed of a Bounder 34J. The water tank was in the way, so removed the water tank and presto there was the pump, used air pressure to blow away the debris and 20 minutes later pump was replaced . Re-installed the water tank and repaired the hole in floor under carpet. On my Bounder I had to remove the jacks, so went thru the floor. Jim
I stumbled across this site, noticed that your wanting to do the same thing as I want to do on my f53 34′ Southwind 460. I have a completely full tank.(75 gallons )
What do you think of coming from under the bed I to the top of the tank ?
Yes I did that and it was a lot easier for me on a 99 Bounder.
The only problem was I had to remove the fresh water tank as it is between the floor and the top of the tank (frame) Jim Curtis
Yes I cut a hole in the floor in front of the bed And then cut a piece of metal that was covering up the fuel tank at able to access the pump period I have a 99 Rexal motor home
Yes I have 2002 Hurricane class A. Eye balled the location underneath, had about 10” of clearance to the floor from the frame. Lifted the bed & carpet, cut about 12” square in the board, scraped out the styrofoam, clipped back the thin tin and there it was. Replaced it, took about 1 hr. Put an inspection cover on, Dropped back the carpet. You wouldn’t even know it had been replaced. Runs like a top. Hope this helps. I’m 78 years old and wasn’t about to remove the tank. If I can do it you can too. Good luck.
On my 1999 Southwind, cutting thru the bedroom floor is a little more of a challenge because the black and gray waste tanks are located in that area.
The black and gray tanks are located inside of a sub compartment (the basement) between the main frame rails, behind the rear wheels. This compartment is about 9-12 inches high and runs the length of the motorhome from just in front of the rear cap all the way to the just behind the front wheels. This sub compartment is heated and all the water plumbing runs thru it.
This compartment has a floor made of sheet metal and is reinforce to support the weight of the tanks.
I’m not 100% sure, I’d need to measure things, but I bet these waste tanks are located directly above where the fuel pump opening is in the fuel tank.
We have a 1999 southwind that we recently purchased. Everything was going great. We just got home from a camping trip and when we start the RV it shuts off when you take your foot off the gas. We checked the fuel pressure and was very low. Wouldn’t even budge. We replaced the fuel regulator and fuel filter and also the fuel pump. It is still doing the same thing any suggestions. Oh and we filled the tank up and took 3 hours to drain the gas.
Is the pump running? If you listen carefully near the fuel tank, you can hear the pump. Have someone turn the key to IGN, but don’t start.. The pump should run for 2-3 seconds.
How did you check fuel pressure? What was the reading?
Yes the pump is running, with a fuel pressure guage. It was 0.
Yes, with a fuel pressure test kit. No pressure
If the pressure is zero, and you can hear the pump running, Sounds like a blockage in a line (unlikely, but possible), a bad regulator, bad pump.
if you remove the fuel line from the front of the fuel filter, you should get a little bit of flow through the filter without running the pump. Have a small container ready to catch fuel. If you cycled the pump, you should get a LOT of flow. NOTE – This is how I drained my tank, I connected a hose to the fuel filter and pumped the fuel into gas cans.
Praise the Lord it works. There was air in the line.
Does your motorhome have the 6.8L V10 motor? I need to replace my fuel pump, called ford and they gave me part # f7uz9h307dc as the fuel pump part # however they no longer manufacturer the fuel pump. I’m looking for some advice to ensure I order the correct pump. Thank you for posting this article, it helps a lot
BTW….I have a 1999 Damon Challenger built on Ford F53 Chassis with the V10 motor
I suspect your chassis is identical to mine. The pump I used should also work in yours.
On my 99 Southwind I Had to get more creative. If you place 4×4’s under the front powerjacks and raise completely, you can brace under the tank and remove all the strap bolts. Then you can lower the front jacks and fully space and raise the rear to leave the tank laying on the ground under the RV. My tank was half full but I was able to change the pump without moving the tank. Reverse the process to reinstall.
EXCELLENT, I used the front straps as a pivot point, but my tank was empty so it didn’t weigh as much as yours.
Wow. What an accurate and informative description. I am a retiree in Australia with a f53 import. Getting help here is a struggle as there are so few of them here. Even Ford dealers scratch their heads. I rely on online posts such as this to maintain my motorhome so thanks heaps.
I have a 95 southwind and wanted to do the same thing, the bed is right over the access to the pump. This makes sense to me. Should all the gas be removed or not. If this doesn’t work I was wondering about exterior mtg. Pump?
I did not remove any gas. Thru the floor, removed water tank, replaced pump, then reversed. NO SMOKING.
fuel pumps works gas guage does not 2003 wild wind 32v
Does anyone know where the fuel pump drive module is on a 2009 Ford f53 Chassis for a 2011 Damon Challenger class A RV? We changed the fuel pump and it’s still not pumping fuel we’re thinking it’s the module
Thanks for the great instructions. I’ve removed my tank and I’m getting ready to install the new pump and had a couple questions. Your photo 12-800 shows a black fitting on the generator connection. My new pump has the same fitting, but no instructions on what to do with it. Sounds dumb, but how did you deal with that? Also, mine also had an extension on the generator line inside the tank that was rotted off and laying in the bottom of the tank. Did you reuse the old extension or install a new one. If new, did you just use 1/4″ fuel hose?
I believe the “Black” fitting is just a cap to cover the fuel line. I used regular ole fuel line hose to make the short extension for the genny pickup.
Great, thank you for the quick response! I have some extra fuel hose to the generator, so that should work. Also, I checked with the manufacturer of the fuel pump and this is what they said about the fitting on the generator hose connection:
“If the Vehicle has 3rd fuel line for an Aux generator then the customer is to remove the cap and install the 3rd line. If the vehicle doesn’t then they don’t do anything. The cap allows the part to be used on vehicles with or without the aux generator.”