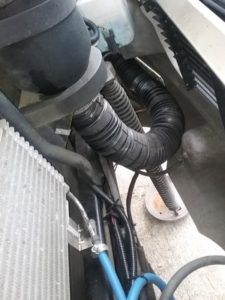
UPDATE – JUNE 2019 – I originally ran my flexible intake tube down, then back up in front of the radiator. Although I didn’t have any problems with this. I decided to reroute the tube so it doesn’t block the radiator.The new route takes it down then over and back up near the drivers side corner of the hood. This should allow better air flow through the radiator.
Under the right circumstances, water can get sucked up into the air intake on early model F53s. This is usually in heavy rain or a lot of standing water. The drivers side front tire splashes water forward, and then it gets sucked up into the engine intake. The water then contaminates and fouls the air filter. The filter then blocks air flow, can freeze, and the filter element can collapse, disintegrate, and get ingested into the engine.
Ford issued a TSB on this in 2004 to replace the existing intake shield with a curved “J” shaped intake tube. After performing the TSB, instead of air getting sucked into the intake from down low, the intake was now up high, out of the path of water splashing up from the road or the front tires. The “J” tube also had a small hole in the bottom to allow any water that got into the tube to drain out.
For those of us who want to bring our older F53’s up to date, the Ford “J” tube no longer exists. Not a problem…
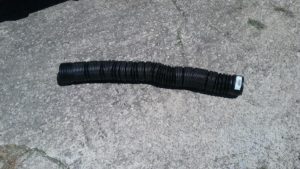
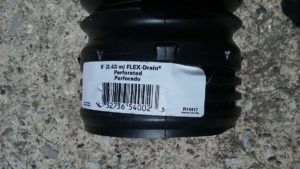 I visited the local Menards big box hardware store (Lowes, Home Depot, Ace) and was looking at PVC pipe to make a “J” tube. I ran across something else that was PERFECT. I found a 4 inch diameter x 8 foot long, perforated, collapsible, accordion style field drainage tube for $5. This drainage tube is used in fields to drain water. The tube is buried in the ground, then when the soil gets wet, the tiny holes in the length of the tube let water enter the tube where it then drains out into a open ditch or cistern.
The tube is rigid enough so it wont collapse and block air flow, The diameter is large enough so it won’t restrict airflow to the air cleaner.
NOTE – DO NOT use something like a dryer vent hose, It isn’t rigid enough and will collapse and block the air flow.
UPDATING THE INTAKE SYSTEM
Review the TSB HERE. I removed the old shield that was in front of the intake.
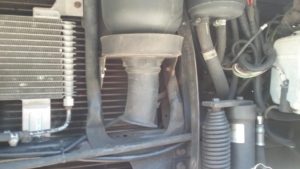
I then used a pair of scissors and cut slits in the end of the drain tube.
I slide the tube over the intake and then where I had cut slits, I used a hose clamp to secure the drain tube to the intake.
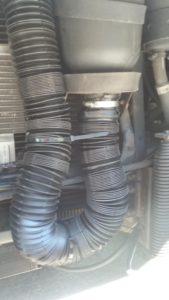
I wanted to loop the open end to the right side of the air cleaner, but on my Southwind, the BCC is mounted there so there’s no room on that side. I looped it in front of the radiator and secured it in place with 18 inch cable ties. I was a little concerned about it blocking air to the radiator, but after several trips of watching engine temperature, I didn’t see any problems. NOTE – I’ve since rerouted the tube to the left side where I had originally planned to route it. This provides better airflow through the radiator.
I put a loop in the tube and ran it back up near the top of the air filter assembly. I use 18 inch cable ties to secure the new “J” tube to the air filter mount frame.
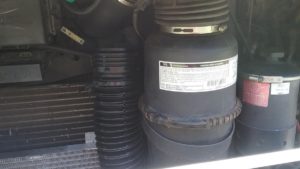
Any water that gets in the tube will drain out the tiny holes in the tube.
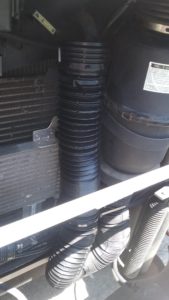
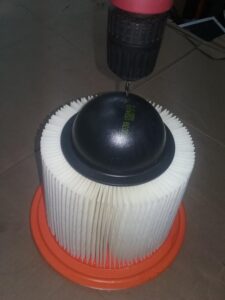
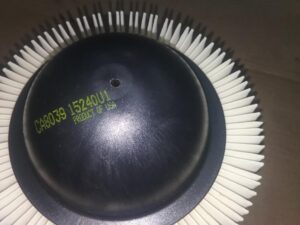
NEW AIR FILTER – When installing a new air filter, drill a tiny hole (1/8 inch) in the tip of the cone. This will allow any water that gets inside the filter to drain instead of accumulating

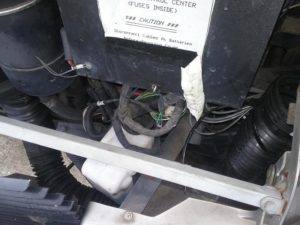
I’m thinking 4″ PVC connected to the bottom of the filter with a no-hub connector and two 90* fittings, 1 standard 90* and 1 street 90*, would be less restrictive.
I don’t think the drain pipe will be restrictive.
When I bought the drain pipe, I also bought 3 inch PVC and two 90 degrees. A 3 inch pipe slides over the bottom intake perfectly. The 180 degree turn moved the pipe out about 1 ft and there wasn’t anywhere to conveniently secure it.
Could one also use a cheap RV sewer hose that has wire to keep it from collapsing?
Thanks.
Pingback: F53 – Clean MAF Sensor – 1999 Southwind 35S
Possibly. Remember, you need to have some holes in the hose at the low point for any water that gets into the hose to drain.
Easy enough. Ice pick or hot soldering iron.
Thanks for the reply. I’ll post pics if I remember to take some.
Do you think this is necessary with a Banks set up?
I don’t know what a Banks air intake setup looks like or if it can suck in water.
Just use PVC pipe. You can bend it in front of a turbo heater or just buy the elbows. I did one on my previous motorhome.
Today I have replaced factory air filter and its housing with K&N air filter RC-4780 (you need to close hole on the filter made for “air restriction sensor: used only in some diesel engines). Installation is very easy. Remove rubber duct from top of the main factory filter hosing.Also loose the clamp that connect with rear plastic duct. Rotate rubber hosing about 45 degree counter clock wise and connect K&N filter which has same size connector as of rubber duct outer end. (Remove factory filter hosing and bottom pipes no more need, no worry of water suction etc.)
Important: Need to remove AFS sensor from factory housing and install on outer end of plastic intake duct.
Stabilize new filter by connect metal plate from a bolt on the filter to a bolt of wiper motor housing plate. Also stabilize side of hosing with a 5-6” clamp to a the black metal pipe holding factory housing. I can share pictures if possible. Let me know if you like to share picture for better understanding.